Friday, September 30, 2011

Pumpkin Cake Cookies

Have you ever ran out of the house not wanting to run into anyone? You think to yourself, "I am just going to run out and hope no one sees me." Today was such a day for me. I arrived home from the gym, walked in the kitchen and was greeted by the Pumpkin Cake cookies I just made, sitting next to the homemade caramel. Warning bells went off in my head, "Get them out of the house before you eat them!" I started to think where I could take them and realized I have not taken the teachers any sweets yet. For shame! I immediately felt guilty and decided to run these down there, but wait. I am all yucky from the gym, but I wanted to get there for their lunch hour. I decided to change and run over there, who could I possibly see? The secretary, whom I love, she would not judge me for my disheveled appearance. The teacher lounge is right in the door, sounds like a good plan right?

I pull up only to discover all the students and teachers walking from the lunch room back to their classes right by the teacher lounge! Ah! What to do?! Only one thing to do, hold my head high and hope all they see are the yummy cookies on the tray. I was feeling successful, talked to some students, greeted the secretary and the other ladies in the office, trying to avoid eye contact, seeing as I didn't have any make up on. Scandalous, I know. I delivered the cookies and looked down to see a big blob of the homemade caramel sauce on my shirt. I was caught, I may or may not have, dipped an apple in that sauce before I ran out of the house. You know I did... sigh... enjoy the cookies.

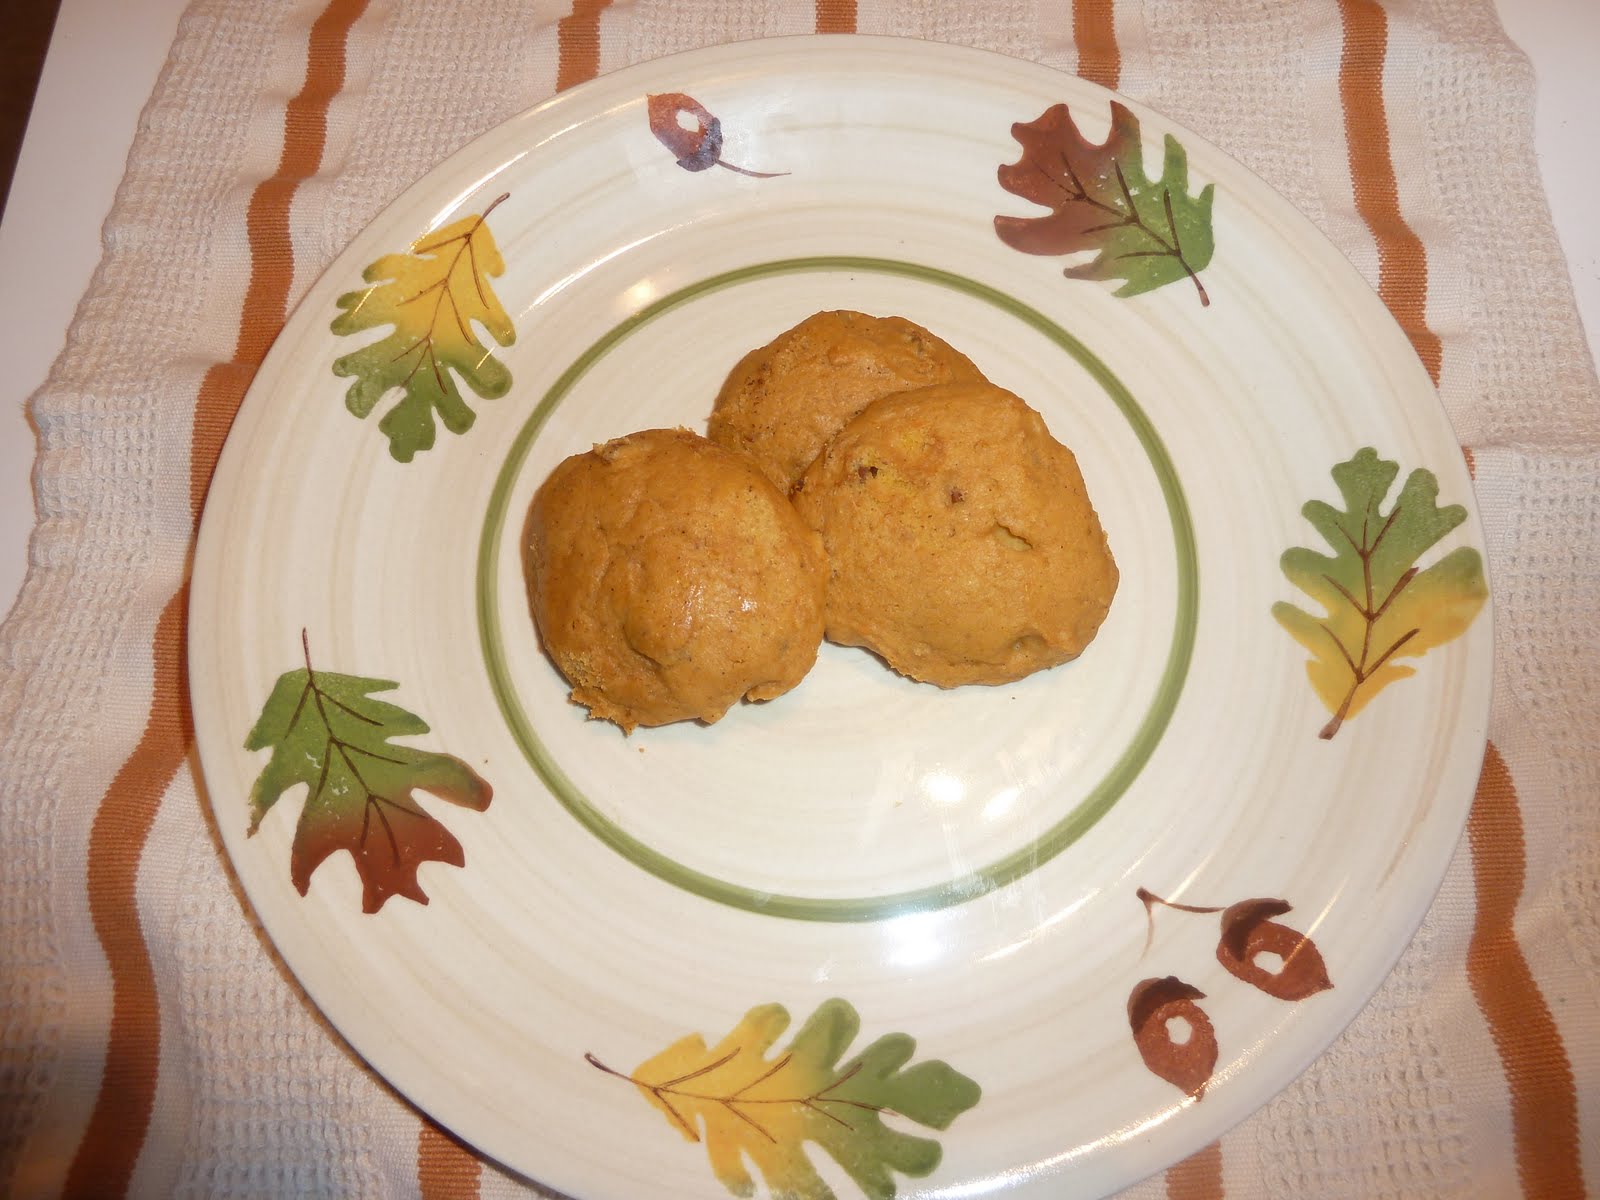
Pumpkin Cake Cookies topped with pumpkin icing and caramel sauce.

Here is how they started, lovely but still looking too plain and somewhat healthy. Must be rectified.

I had plenty of pumpkin left, so I topped them with pumpkin icing. Hmm... still missing something. Good, but not fattening enough.

Enter Caramel Sauce! Little fact did you know that when you melt sugar this is what happens. You probably did, but I had never done it before. I was mesmerized. Doesn't take much folks. Moving on.

There, that's more like it. I hope the teachers enjoy them!

Do you have a funny "run out of the house story"? I'd love to hear it.

Pumpkin Cake Cookies:

Ingredients
1/2 cup butter
1 cup packed brown sugar
2 eggs
1 cup canned pumpkin (not pie filling)
2 cups all-purpose flour
2 teaspoons baking powder
1/2 teaspoon baking soda
1/2 teaspoon salt
1/2 teaspoon ground cloves
1/2 cup chopped pecans

Directions
Preheat oven to 350 degrees F (180 degrees C).
Cream butter; add brown sugar, beating well. Add eggs and pumpkin; beat well.
Sift together flour, baking powder, baking soda, salt, and spices. Add to creamed mixture; mix well. Stir in pecans.
Drop dough by rounded tablespoonfuls, 2 inches apart onto greased cookies sheets. Bake for 12 minutes. Remove to wire racks to cool.
Drizzle with Pumpkin Icing and Caramel Sauce.

Pumpkin Icing:

1 cup powdered sugar
1/4 tsp of the following spices: cinnamon, nutmeg, cloves, ground ginger
2 Tbls pumpkin puree
Heavy Cream

Directions:

Sift the powdered sugar and spices together. Begin to drizzle the heavy cream into the mixture whisking until smooth. Whisk in the pumpkin puree.

Caramel Sauce found here: http://thegreatcakecompany.blogspot.com/2011/09/sunday-baked-caramel-apple-cake.html

Thursday, September 29, 2011

Pumpkin Monkey Bread meets Sticky Bun

Enter Pumpkey Buns! Oh yeah, I sat up all night thinking of that one.

Meanwhile, I have been wanting to try this recipe ever since I saw it. I did, however, want to put my own spin on it. My mom owned a restaurant, back in the day, and she made Caramel Cinnamon Buns, I wanted to incorporate that somehow. This is what was created.

Please excuse my photography, I don't claim to be an expert, I just point and click and pray it looks delicious.


I made this Pumpkey bread ring also, looks delicious right? Nod your heads... thank you. Please ignore the sippy cups in the background. Just keepin' it real around here.

The Pumpkey Bun of deliciousness!

Pumpkin Monkey Bread:

For the dough:
3 1/4 cups flour, plus extra for kneading
1/2 tsp salt
1/2 tsp cinnamon
1/4 tsp nutmeg
1/8 tsp cloves
2 Tbsp unsalted butter, melted
1/2 cup warm milk
1/4 cup warm water
2/3 cup pumpkin puree
1/4 cup sugar
2 1/4 tsp active dry yeast

For the coating:
1 cup sugar
2 tsp cinnamon
3/4 stick butter, melted

Topping:
Honey
Brown Sugar
Pecans

sugarcrafter.com detailed the recipe perfectly, so I must give her credit, find the directions here http://sugarcrafter.net/2011/09/23/pumpkin-monkey-bread/ except for the topping. Come back here for topping details.

Before you put the dough into the pan or muffin tin:

Pour honey in the bottom of the pan or each muffin space, sprinkle with brown sugar pecan. Put about three of the dough balls into each muffin space.

Once it has baked, about 20-25 min for buns at 350, let cool for about 5 min, then turn out onto platter. Enjoy!

Wednesday, September 28, 2011

Take a walk down Memory Lane with me.

I just wanted to take this time to reflect on some past projects. Come, reflect with me. Summer has officially ended, the pool is closed and the weather is turning. Let's hang on to the last little bit of sunshine. Don't get me wrong, I love, love fall and am looking forward to it, but I will miss the outdoor playdates, my summer babysitters and all that glorious sunshine.


Here was a prom party cake that I adore. It was a midnight garden theme and I love how it came out.

Who doesn't like a red sports car? This cake was made for "Nana" who wanted a red sports car, so I aim to deliver. I'm pretty sure she meant one that had an engine, but hey, I tried.

Birthday cake! I love everything about birthdays, it doesn't even have to be mine. They are a great excuse to have a party and eat cake!

Birthday cake again! This one was made for a good friend of mine, who I sadly don't live near any longer, but every time I see this cake it makes me smile and think of her... I should probably call her soon.


Fun Spongebob cake made for our neighbor.

Thanks for reflecting with me. I like taking strolls down memory lane every once in a while

Monday, September 26, 2011

Chewy Chocolatey Pecan Pie Bars

Every Sunday you can pretty much count on me being at church. Whether I am sitting in the service or working the nursery, I look forward to attending every week.

One thing that makes my church so special are the people. I have made lifelong friends that I am honored to call my family. One such person is our Associate Pastor, just about every Sunday or Wednesday night after church, my boys rush to his office. His office is full of unique items for them to play with, and he is so patient showing them how to work them all. Of course they always leave with a treat from the goodie jar.

Well, today is his birthday, so we wanted to make him some goodies to thank him for his kindness. I found out he likes pecans, and I wanted to try pecan pie bars with caramel. The result was chewy goodness in a bar. I had to taste test these a few times (to make sure they were good) and they are yummy!


If that picture didn't make your mouth water, maybe the next one will.

Chunks of pecans and chocolate chips contribute to the chewy, chunky goodness.


Packaged up and ready for delivery!

Pecan Pie bars:

For the Crust:
1½ cups all-purpose flour
½ cup (1 stick) butter, softened
¼ cup packed brown sugar

Filling:

20 caramels, 3Tbls Butter, 3Tbls Milk
3 large eggs
1/4 cup corn syrup
1/2 cup granulated sugar
2 Tablespoons butter, melted
1 teaspoon vanilla extract
1¾ cups coarsely chopped semisweet or bittersweet chocolate (or chocolate chunks in a bag!)
1½ cups chopped pecans

1. Preheat oven to 350°F. Grease a 9×13-inch baking pan. In a saucepan over low heat, combine caramels, butter and milk. Cook, stirring frequently, until smooth. Remove from heat and set aside.

2. For the crust, mix together the flour, butter and brown sugar until crumbly. Press into the baking pan and bake for 12-15 minutes or until lightly brown.

3. For the filling, beat the eggs, corn syrup, sugar, butter and vanilla extract with a wire whisk. Stir in the chunks and pecans. Pour evenly over the baked crust,then pour caramel drizzle evenly over the pecan mix and bake for 25-30 minutes or until set.

4. Cool in the pan on a wire rack. Cool completely and cut into bars. Store in an airtight container at room temperature (or in the refrigerator if you live in a warm/humid area with no air conditioning).

Recipe adapted from the browneyedbaker.com

For those of you who still prefer pecan pie, here was my muse for this bar:


Caramel Pecan Pie

Ingredients:1 (9 inch) unbaked pie crust
36 individually wrapped caramels,
unwrapped
1/4 cup butter
1/4 cup milk

1/2 cup brown sugar
3 eggs
1/2 teaspoon vanilla extract
1/4 teaspoon salt
1 cup pecan halves

Directions:1. Preheat oven to 350 degrees F (175 degrees C.) In a saucepan over low heat, combine caramels, butter and milk. Cook, stirring frequently, until smooth. Remove from heat and set aside.
2. In a large bowl, combine sugar, eggs, vanilla and salt. Gradually mix in the melted caramel mixture. Stir in pecans. Pour filling into unbaked pie crust.
3. Bake in the preheated oven for 45 to 50 minutes, or until pastry is golden brown. Allow to cool until filling is firm.

Recipe adapted from allrecipes.com


Friday, September 23, 2011

Candy Corn and Ombre Love

Show of hands, how many of you know what Ombre means? Really? That many of you. Well, for those of you still staring at the screen trying to figure out if it's even a word or how one would pronounce it, welcome to my club. I tried looking it up on dictionary.com and didn't find anything, so I started "surfing" and I finally found this:

Origin of Ombré: French, past participle of ombrer to shade, from Italian ombrare, from ombra shade, from Latin umbra. First Known Use: 1893- Merriam Webster Dictionary

Aha! It's basically, a graduation of colors. It seems to be popular right now, from hairstyles, to decorating, even in the baking world. Who knew?

Meanwhile, I wanted to jump on the Ombre train when I saw sweetsugarbelle.blogspot.com create an Ombre cookie, I had to try it. I didn't want to copy hers exactly just use her technique. I went in knowing mine would not look half as nice as hers, but I had an idea.


Candy corn Ombre hearts. Candy corn are Ombre-ish aren't they? Well in my world they are!

I don't have an airbrush, yet, so I used these great tools. Spray mist like Sugarbelle suggested(I've been wanting an excuse to try them) I didn't want to try them on a cake until I practiced on something else. Sugar cookies!

First you flood ice the cookie white, then hold something over the part you don't want sprayed and spray yellow.


When that dries do the same with the orange. Mine aren't perfect of course, I think I held the can too close to the cookie because the color kept running. Practice makes perfect! I did look at a real candy corn though and noticed their lines aren't perfect either, just sayin.


See :)

I also wanted to try a dessert I saw on glorioustreats.com to continue with my candy corn theme.

Candy corn colored cheesecake mousse. Yum, can't wait to eat those. I did add chocolate chips to her recipe however, I always look for ways to add more chocolate to my life. Doctors orders, or was that fiber... I've heard it both ways.

In other treats of the week, snacks for my boys. They love to help, or at least try.

Not sure what they are called, so I will call them Yummy Sweet and Salty Goodness Squares. YSSGS for short. I will make these often, so easy and delicious.


I did make one mistake, I put them toward the front of the fridge. Every time I opened the fridge I wanted one, to the back of the fridge they go. Trust me, I won't forget about them.


That's a wrap for this week, or many wrappers in this case.

Recipes:

Candy corn cheesecake mousse

1 package (8 oz.) cream cheese
1/2 cup powdered sugar
1/4 cup milk or cream
1 teaspoon vanilla
1 small container (8 oz.) Cool Whip, thawed

I added mini chocolate chips in between each layer

orange and yellow food color
candy corn (for garnish)

Directions ~
Beat cream cheese in the bowl of an electric mixer until fully smooth. Slowly add powdered sugar, then milk (or cream). Add vanilla. Continue mixing. Beat about 1 minute on medium to medium-high speed. Fold cool whip into cream cheese mixture, and stir until fully combined.

Scoop about 1/3 of the Cheesecake Mousse into a bowl, and color orange. Color another third of the mixture yellow. Leave the remaining third white. One color at a time (starting with yellow), scoop mixture into a piping bag or large ziplock bag, and squeeze a layer of the Cheesecake Mousse into small dessert dishes of your choice. Repeat with orange and then white Mousse.

Refrigerate 30 minutes (or up to 1 day) before serving. Garnish with candy corn if desired.

Recipe yields 4 moderate servings or 6-8 mini servings.

Recipe Source: Glorious Treats

YSSGS

Square pretzels

Hershey kisses

M&M's

Place kisses on pretzels and bake on low heat in oven (I used the warm setting on my oven) for about 4 minutes, until they are soft.

Put M&M on top and press lightly.

Place in fridge to set, about 30 minutes or until you can't wait any longer.


Wednesday, September 21, 2011

Dessert to the Rescue!

A little fact about myself: I love surprises! I think everyone else should too, but that is not the case. My husband dislikes surprises and I think my sons have inherited that from him.

As promised, I made a worthy dessert for the local firemen up the road (see last post for details) I thought it would be great to surprise my boys and take them with me to drop off the dessert so they could see the firehouse we pass, almost daily, up close. They always point and yell "fire truck". Great surprise right? We pull up and my 4 year old finally gets it and says, "What are we doing here?" I tell him we are giving the firemen the dessert Mommy made.

We walk in and as it happens, there is a playdate there on a tour. I explain why we are there and hand over the goodies. We are asked to join the tour, so we do. The nice fireman promptly asks my sons, 4 and 2, if they want a sticker. Blank stares. Ooh, he knows, how about getting in the fire truck. Blank stares. Thats right my sons just stare blankly at him. Ok, one more time, "do you boys want to turn on the lights?" Woohoo! I think, of course they do. No, more blank stares!.... sigh. I guess surprising them backfired on me or they were in such awe they didn't know what to do. Guess I should have prepared them, but how was I supposed to know they were going to get a fabulous tour.

On to the dessert! Brownies! I had some left over cookie dough so I added chunks of that to the top of the brownies before I baked them. YUM! But beware, you need a glass of milk for these rich squares of goodness.

My husband, who would win an award for being the greatest husband ever (I know you want to argue that yours would, but save your breath, mine is the best) He said, and I quote, "I've had better" What?? Now granted I usually bake cakes, cupcakes and cookies and this was actually my first attempt at scratch, not-from-a-box brownies, but "I've had better"? Really? I will forgive him, because first, maybe he has tasted a better brownie (doubt it) and second, because he is so very patient taste testing everything I throw at him (a tough job, I know) so I took them to my other reliable taste tester (the church secretary) and she loved them.... there that's better.

Here is one for you, complete with milk.


Oh, and my sons finally found their voices and got on the fire truck, turned on the lights and asked to get on everything else they had there.


Gotta love em!


Big thanks to Fireman Ryan for showing them around. Enjoy the brownies and don't forget the milk!

Recipe from CookiesandCups.com

3/4 cup cocoa, unsweetened
1/2 teaspoon baking soda
2/3 cup vegetable oil
1/2 cup boiling water
2 cups sugar
2 eggs, lightly beaten
1 1/3 cups all-purpose flour
1 teaspoon vanilla
1/4 teaspoon salt
1 cup of whatever you want to add whether it is chopped walnuts, chocolate chips or any other candy. ***

Combine cocoa and baking soda in mixing bowl; blend in 1/3 cup of the vegetable oil. Add boiling water and stir until thickened. Stir in sugar, eggs, and remaining vegetable oil; stir until batter is smooth. Stir in flour, vanilla, and salt, mixing until well blended. Pour into a greased 13x9x2-inch baking pan. Bake at 350°. 9×13 pan bake for 30-35 min 9×9 pan increase time to 40-45 min.

Sunday, September 18, 2011

Cookie dough and snickerdoodles

One of the things I love just as much, if not more, than baking is my church. So when I was asked to drive a group of girls on a youth group video scavenger hunt this last weekend, of course I said yes! Oh and I was also asked to make two desserts, I started to wonder if that was the real reason I was asked, but there were more important things to think about, like, what to bake. I sat down and pondered hmmm.... I have to make something with cookie dough, I have observed that teens love cookie dough, maybe because they were always told to get their fingers out of it while there mom was baking. Cookie dough cupcakes were the obvious answer, so that was set.

Here are cookie dough cupcakes, sorry I didn't get a picture of the cookie dough goodness inside, just know it was there and it was good.


I knew the youth Pastor likes snickerdoodles, but I wanted to make something a little different so I made snickerdoodle blondies that I found on one of the blogs I love.

The desserts were delicious, or so I heard, I taste tested them, but I always like to hear it from those I bake for. The true test is how many were left over and sadly, I have no idea, as I had to leave early.

As for my driving skills, well, everyone is still alive and we got 3rd place. Big thanks to my husband for picking his nose on camera. :) Yes, that was one of the many crazy things we had to do.

I think the next thing I bake will be for the fire department that we went by, that poor fire fighter had to stop. drop. and roll for us and we were not the only group to stop by. But what I noticed out of the corner of my eye were these sad store bought cupcakes that were marked clearance. That was just so sad to me. These men keep us safe and they have reduced themselves to store bought cupcakes, the inhumanity! I have made it my mission to rectify the situation and bake them something yummy for being the good sports that they were. Hmm.... something new to ponder. Tune in next time for the "Fire fighter dessert rescue!"

The recipe for the snickerdoodle bars is found here: http://cookiesandcups.com/weekend-sugar-fix-snickerdoodle-bars/

Saturday, September 17, 2011

I have been going on alot of playdates recently, which is always a good excuse to bake and take it to my fellow mommies to taste test. I have been experimenting with sugar cookies and trying my hand at decorating. Needless to say, I have been having fun. Here are a few of them.

These first ones have a funny story, well it's funny now, it wasn't then. We were going to a playdate at one of the mommies houses, so I thought, perfect, I will bring some fun cookies. I was up all night finishing them, seeing as these are a new project for me. The next morning, I was busy getting my boys ready etc etc the usual "crazy morning trying to get out of the house crazy". We get to the house, she lives a good 25 min away and I *gasp!* forgot the cookies. I about cried! Almost drove back home, but alas, did not, just had cookies around for awhile.
Here are the forgotten cookies.


Next playdate cookies were for the pool. Which is in my neighborhood, so even if I forgot them, I didn't have to go far.


Oh sweet sugar cookie goodness! These were chocolate sugar cookies that I used from one of my favorite blogs http://lilaloa.blogspot.com/2011/03/end-all-for-chocolate-cookies-recipe.html

Carrot Cake

I was asked to make a carrot cake and so I wanted to try a new recipe. Thanks to Emeril I found a fabulous one, probably one of the best cakes I have made. I couldn't stop "taste testing" this one.


The hard part was shredding all those carrots! I had a hand cramp, but so worth it! Yes, laugh at my stone age method of shredding. There is probably a better way, but this is what I had on hand.


I made one change, I put the nuts on the outside instead of the inside, much prettier and tastier, in my humble opinion.


You can find the recipe here: http://www.foodnetwork.com/recipes/emeril-lagasse/gigis-carrot-cake-recipe/index.html