Monday, October 31, 2011

Inside Out Peanut Butter Cups


One night a friend of mine pulls a plastic baggie from her purse with a little piece of cookie in it. She excitedly hands me the bag and says you have to taste this. I reach in the bag and pull out a small bite of cookie. Her husband got a half of this cookie, which he quartered and brought home to his wife to taste. She then halved the quarter to bring to me to taste. So here I sat, bite in hand and thought "what in the world", but I proceeded to put it in my mouth. It was very obviously peanut butter and chocolate. They both loved this cookie so much, they wanted me to try to recreate it. Hmmm.... on a bite of cookie? I am always up for a challenge, so I decided to do a little more research. As it turns out, it is from a bakery downtown and the cookie is called an Inside Out Peanut Butter Cup. There were no pictures or explanation, that was it. I could have driven downtown and bought one, but I have three small children to pack in the car and that just didn't seem fun and where is the challenge in that. What follows is what I came up with. Enjoy!

First up, find a fab peanut butter cookie recipe.
Ok , so I found a recipe, but it didn't turn out as "peanut buttery" tasting as I wanted it too. I am still on the quest for one. When I find it, I will come back here and amend this post. These were still delicious, I just suggest making your tried and true peanut butter cookie recipe if you have one.
It is a recipe for peanut cookies that you press a peanut butter cup in. I think I need just a regular cookie recipe.


We will skip to the "put in the oven" part. After you make your fab peanut butter recipe, if you have one, please share. I am looking for a moist peanut butter cookie. Put the cookies in a muffin tin and bake.
I used a mini muffin pan, but come to find out the original cookie was regular muffin size. I guess that is what I get for not driving downtown. 


After you take them out of the oven, while they are still warm, press an indent in the top with a spoon.


Fill the cups with Ganache. I got this part right. Woohoo! The chocolate was great and a good consistency, but it over powered the peanut butter flavor. Again, a moist peanut butter cookie that has a strong peanut butter flavor. Ok, moving on.


I had some trouble getting them out of the pan so I used a toothpick to get the cookie started, then I could lift them out. Otherwise you may just keep getting chocolate all over your fingers. Not such a bad thing though. 


Place on wire rack to cool. These cookies were best warm, wow they were good. Once they cooled, they seemed to have lost the moist,  peanut buttery goodness. My sons and I ate about a dozen while we were waiting for them to cool. So the key is, if you are going to use this recipe, eat them warm. 

If you are already thinking of a recipe that would be perfect, please, OH PLEASE, share it with me.
Until then, I will be searching and experimenting.

Oh, by the way, my friend still loved these and managed to eat her fair share of them, however, she agreed they needed to be bigger, moister and have a more pronounced peanut butter taste.
The quest continues.......


Baking from my heart to your kitchen,


Sunday, October 30, 2011

Caramel Apple Cake

Pin It

I have been itching to try this cake ever since I pinned it on Pinterest from Jaime"s blog The Great Cake Co., You can click on the link and check her fabulous cake out. Just don't judge mine by hers, because hers is perfection on a plate. Mine, well, I tried.
The point is, this cake is fabulous!
I took one bite and swooned. I could live off of the caramel sauce alone. 
I was able to make it for a Fall Family Fun night with some friends for our kids.
Everyone who tried it raved about it. 

The cake has quite a few steps, but they are definitely worth the effort.
If you have a fear of baking, you might not want to try this, just enjoy ALL the pictures and ask me to make it for you. There is no doubt I will be making it again. 

I didn't follow Jaimes recipe exactly. I tweaked it a little because of the ingredients I did or didn't have.

Ready or not, let's make cake!


First on the list, homemade applesauce.
You can skip this step and buy a jar from the store, perfectly acceptable.
I am, however, an overachiever, so I had to try it. 
It took me a whole day to make this cake, my three boys that kept interrupting me wanting to play, eat lunch and just distract me for the fun of it. You will hear all about that too.

For the Applesauce you will need:

 6 apples, peeled, cored and quartered
(she used, 3 Granny Smith and 3 Golden Delicious) 
(I only had Honey crisp, so I used 6 of those)
 1 cup Apple cider
 1/4 cup apple juice
3 tablespoons butter
 2 tablespoons honey
1 tablespoon dark brown sugar
3/4 teaspoon ground cinnamon


Her recipe called for boiled cider, but all I had were these yummy cider packs. I just boiled some water and made apple cider and used that. I had planned on only using the 1/4 cup her recipe called for, however, when it came time to pour it in, one of my children asked me a question and I had a brain malfunction and dumped in the whole cup. Now I had to adjust the recipe to have 1 cup of cider and 1/4 cup of apple juice. I have learned to just roll with it, good thing it still tasted quite yummy.
Even if you only get as far as the applesauce, it was worth it. Recipe follows.


Applesauce Directions:
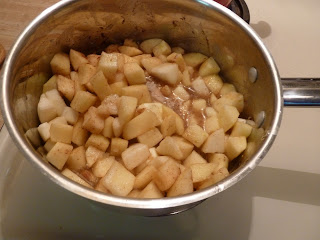
In a medium saucepan, combine all ingredients, and stir to combine.
Cover the saucepan, and cook over medium heat for 15 to 20 minutes, or until apples are soft. 


Allow to cool, then mash with a fork or potato masher to your desired consistency.
I tried the fork thing, didn't work too well, it would not mash the chunks. I got out my mixer and that worked much better. Word to the wise, put the applesauce in a larger bowl if you decide to blend with a mixer, that way apples don't go flying. I was not so wise, learn from my mistakes, please.

Chill sauce to room temperature before adding to cake batter.


Preheat your oven to 325 degrees.Butter three 8" round pans and line with parchment paper.

 Apple Cake:

4 cups all-purpose flour
2 teaspoons baking soda
1 teaspoons baking powder
1 teaspoon salt
1 teaspoons cinnamon
1/2 teaspoon ground allspice
1/2 teaspoon ground cloves
1 1/2 cups (3 sticks) unsalted butter, cut into 1-inch cubes, at room temperature
2 1/2 cups sugar
2 large eggs
4 cups homemade applesauce (see recipe above) or store-bought unsweetened applesauce


Sift the flour, baking soda, baking powder, salt, cinnamon, allspice, and cloves together into a large bowl. Set aside.


In the bowl of a standing mixer fitted with the paddle attachment, beat the butter until creamy, about 4 minutes. Add the sugar and beat until light and fluffy, about 3 minutes. Add the egg and beat until combined.


Add the flour mixture to the mixer bowl in three parts, alternating with the applesauce, beginning and ending with the flour mixture. 


Scrape down the bowl, then mix on low speed for a few more seconds.

This made ALOT of batter. If you have three high-sided pans, great, use it all. I did not, so I made a few mini "taste-tester" muffins as well. Just so you know, you will have enough batter to make a bigger cake or make a few cupcakes as well. Just sayin', it's a thought.


Divide the batter among the prepared pans and smooth the tops. Bake for 40 to 45 minutes, rotating the pans halfway through the baking time, until a toothpick inserted in the center of the cake comes out clean. 

While those are cooking, let's work on the Caramel "to-die-for" sauce.

 Caramel "to-die-for" Sauce
:

1 1/2 cups sugar
1/4 cup corn syrup
1/2 cup (1 stick) of butter, softened, cut into 1/2-inch cubes
1 ½ cups heavy cream

This makes about 2 cups, and you will want it all, whether you put it on the cake or not. 


In a medium saucepan with high sides, combine the sugar and corn syrup with 1/2 cup water. Stir the mixture gently so you don’t slosh any of it up the sides of the pan.
Turn the heat to medium-high and continue stirring until the sugar dissolves. 

The picture above it is not quite dissolved.


This picture it was dissolved. Just thought you would like a visual. I definitely work better when I can see what it is supposed to look like.


Increase heat to high, stop stirring, and allow the mixture to boil.
Once it begins to turn a rich caramel color 
(if you don’t want to eyeball it, take the caramel to 300 degrees F on a candy thermometer)


This is what it looked like at 264 degrees

  
Then it jumped to 300 degrees and it didn't look quite rich brown enough, so this is what happened at 311 degrees.
I should have taken it off at 300, because it got a little browner when I took it off the heat. 
So, if you do not have a thermometer, this is what it should look like.


Remove it from the heat, add the butter and cream, and stir until combined. 

I was on the phone when I did this step, I put the butter in and it sizzled a bit. Then I started to put the cream  in and it really sizzled and started "clumping" automatically. Needless to say, I had to end my phone call and concentrate. I am not a great multi-tasker. Again, learn from my mistakes and pour the cream in slowly, stirring as you go. If for some reason it clumps on you like mine, put over low heat and stir until it dissolves. It may be wrong to do, I'm not sure, but it worked for me.

 You can save the caramel sauce, tightly covered, in the refrigerator for up to 1 week. Let it come to room temperature before using it on cakes, ice creams, or quick breads.
If you want a warm topping, heat the caramel sauce in short bursts in the microwave or in the top of a double boiler.


The end result.
I took one taste and I was in caramel heaven. I could eat this at every meal. My son always wants some "dip-dip" a.k.a. ketchup, syrup, ranch at every meal.
This is officially now my "dip-dip"

I hate to move on , I could rave about this caramel more, but we must talk about the frosting. It is equally delicious.

 Caramel Buttercream:

1½ cups sugar
1⁄3 cup all-purpose flour
1 1/2 cups whole milk
1⁄3 cup heavy cream
1 1/2 cups (3 sticks) unsalted butter, soft but cool, cut into small pieces
1 teaspoon pure vanilla extract
1⁄3 cup plus 2 tablespoons Classic Caramel Sauce (see recipe above), at room temperature


In a medium, heavy-bottomed saucepan, whisk the sugar and flour together. Add the milk and cream and cook over medium heat, whisking occasionally, until the mixture comes to a boil and has thickened, about 10 to 15 minutes.

Transfer the mixture to the bowl of a standing mixer fitted with the paddle attachment. Beat on high speed until cool. Reduce the speed to low and add the butter and vanilla; mix until thoroughly incorporated. Increase the speed to medium-high and beat until the frosting is light and fluffy.

Add 1⁄3 cup of the caramel and continue mixing until combined. If the frosting is too soft, put the bowl in the refrigerator to chill slightly, then beat again until it is the proper consistency. If the frosting is too firm, set the bowl over a pot of simmering water and beat with a wooden spoon until it is the proper consistency.


  Um, I forgot to take pictures of the buttercream process. My cakes were done and I removed them from the oven, lost my train of thought (not hard to do) and completely forgot to take pictures. Sigh... let's move on to assembling the cake and not focus on my lack or concentration. I am sure you did a fantastic job on the buttercream.
If you do need me to go back and make it again, I will. 
However, next time I make it, I will make a little extra.
It does cover the cake, but it made me nervous, I had just enough for the cake, not enough to cover the extra cupcakes the batter made.


I leveled the cakes, because I like them even and it made the caramel drizzle seep into the cake. Yum. So yeah, drizzle caramel over the first layer.
Another lesson, put more than just a drizzle. Spread a thin layer over the cake.
This stuff is great and I wished I would have put more in the layers.


Spread Caramel Buttercream over the caramel layer and repeat with the next layer.
Trim the top of the last layer and then place it on top of the cake bottom side up. 


You should end up with something like this.


Spread a very thin layer of frosting over the entire cake (crumb coat) and place the cake on the fridge for 30 minutes. Remove the cake from the fridge and use the remaining frosting to ice the top and sides. 


Pour the Caramel Sauce over the cake. Mine started drizzling down the sides. I wasn't sure if I wanted it to do that, but it did, and it looked yummy!
I had extra caramel, which I put in a mason jar and gave to my fabulous friend who graciously let us invade her house for this party. I am now regretting the decision to give away all the sauce, because after writing this post I want a spoonful of it. I really should have saved a little for myself family. I guess I will have to make more. It's a rough life.


Pin It
The only thing left to do is slice and enjoy.
Just a side note, I made this cake the night before. I placed it in the refrigerator overnight without pouring the caramel sauce on yet. I took it out of the fridge the day of and brought it to room temperature before pouring the sauce on at the party. We did use some of the extra sauce to pour over the individual slices as well. Enjoy and please come back and let me know if you try it.

I really can't wait to make this cake again, it was SO, incredibly good. I want everyone to try it.


Baking from my heart to your kitchen,


Friday, October 28, 2011

Simply Saturday: Ganache... Ga-what?

Ganache. Ga-what? 
That is what I occasionally hear when I say, "I covered such and such with ganache". So, for all of you who look at me with that "deer in the headlights" look when I mention ganache, this is for you. My husband requested I cover some Oreos with Ganache, so bonus for you, except he ate them all before I could get a final picture. Gotta love him, and you gotta love this ganache. 


Here are the Oreos, which we will talk a little more about at the end. This is just a teaser so you will continue reading. 

Here is what you will need:
3 tablespoons corn syrup
6 ounces heavy cream
12 ounces dark chocolate, I use Ghirardelli choc. chips
1/2 teaspoon vanilla extract

I use Alton Brown's recipe which you can also find here 
There are many recipes out there, I just love his.


In a small saucepan combine the corn syrup and heavy cream.
Bring to a simmer.


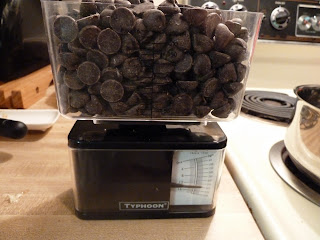
Alton recommends weighing your chocolate, so I do, just because he said too.


Bring the contents of saucepan to a simmer and add the chocolate. Stir until smooth.


It will get to this chunky state, keep stirring.


There, smooth.... yum. You could just grab whatever food substance you have nearest you and starting dipping. Your pb&j sandwich, a cookie, hey, even a carrot, whatever. You could also put in between the layers of a cake. If you would a ganache frosting, let it cool then beat it with a mixer until it reaches the consistency you need.  
I chose to dip an Oreo.


I just threw placed, it in the pan.


Spooned some over the top.


And out came some chocolate love. I was getting to the bottom of the pan with this picture.


Place on waxed paper.


Let cool until set, I actually like to put mine in the fridge. The great thing about the ganache, is when you refrigerate it, it does not harden. 

So go! Dip something!


Wednesday, October 26, 2011

Dessert, Devotions and a Pumpkin Roll tutorial

Pumpkin Roll

One of my friends, we will call her Nicole (because that is her name), makes up our Mommy Play Date calendar. She wanted to do something just for us Moms. Something that would encourage our hearts and lift our spirits. She came up with a fabulous idea.

We could have some moms over to one of our houses and have an experienced, wiser mom in the church, who has already raised her children, come and give a small devotional about being a mom. She would share some of her wisdoms and maybe answer a few questions.  I could certainly use some help. Nicole wanted to do a lunch and bring the kids. As much as I love my boys, having our children there might be a bit distracting. I know everyone else has angel children that never interrupt when you talk, have impeccable table manners and would never embarrass you in public. Mine, well, they're boys and even though we are working on the "don't interrupt when mommy is talking to someone", it is still a work in progress. So maybe a Mom's night in and leave our angel children home for some Daddy time. 

We are blessed to have a wonderful church with many "seasoned Moms" that we could ask to come and share some wisdom with us. We both had a few ladies in mind.  We asked around and found a few ladies willing to come share.We chose a lady for the first night and prayed some Mom's would be able to come. 

It's no secret I love desserts, so I had to incorporate that into the night somehow. Thus, a night in of "Dessert and Devotions" was born.
.
Now, what to make?

This same friend has been leaving not-so-subtle hints that she wanted me to make a pumpkin roll, so in honor of her and her fabulous idea, I decided to make one.

Let's chat about it for a minute.
Here is what you will need:
Cake:
1 cup sugar
3/4 cup flour
1 teaspoon salt
1 teaspoon baking soda
1/2 teaspoon cinnamon
3 eggs
2/3 cup mashed (canned) pumpkin
1/2 cup chopped walnuts (optional)

Filling:
8 ounces cream cheese, softened
1 tablespoon butter, melted
1 teaspoon vanilla
1 cup powdered sugar

First, preheat your oven to 350 degrees and grease a 15 x 10" jelly roll pan. I'm going to stop right here and say, jelly roll pan? Seriously what is the difference between a jelly roll pan and a cookie sheet? After researching a little and please excuse my ignorance, but I have not been classically trained. I'm a learn as you go type a gal. These pans are basically the same, however a jelly roll pan has higher sides. That way, whatever you bake in it does not spill over. I looked through my pans and hurrah! Found one that fit the bill.


I have had this pan for some time, so disregard that it is not the prettiest of pans. Notice that the sides are higher than the average cookie sheet. Line the greased sheet with parchment paper, making sure some hangs over the sides, and grease again. Grease up the sides as well. No sticking is allowed.
Let's get to mixing.


I put all the dry ingredients in first, then added the pumpkin. Started mixing at this point and added the eggs one at a time. Mix until combined.


Pour the batter into your designated pan of choice.


Smooth out so that all sides are evenly distributed. Bake for 15 minutes, that's how long mine took.


Now the tricky part. Find a dish towel that does not have any texture. I found my Valentine towels work, so look through your holiday towels, you might find one too.
Sprinkle the towel with powdered sugar and carefully flip the roll over onto the towel. I asked my husband for assistance on this, but after thinking about it, I could have flipped it onto another surface and then slid it onto the towel. You could try that and let me know or just let me know what works best for you. I always attempt stress-free baking, but there is always one step that worries me. I didn't want to break it, but I flipped it with not cracks. Whew! Crisis averted.


While it is warm, gently roll up in the towel to cool.


Here is what my roll of love looked like.


While the roll is cooling, let's work on the filling. Put all the ingredients in a large bowl and mix away until light and fluffy. This is what light and fluffy looks like to me.


Spread evenly on the roll with an uneven spatula or whatever you have on hand. If you are feeling nutty, you could sprinkle some nuts on at this point. I know that Nicole prefers not to feel nutty, so I left them off.


Carefully roll up. This was messy for me because I didn't like the first roll up so I tried to unroll and do over. Needless to say, I just got the filling all over my hands. I may or may not have licked it right off my fingers. If I did do something as ungraceful as that, I would wash my hands afterward, so don't worry, no germs would have been transferred. My point is, just roll it up as best you can, don't worry if it looks messy like mine. After it is refrigerated it looks much better. Speaking of which, after you roll it up, place in the refrigerator for at least an hour.


See, much prettier. I just sliced a piece off the front, I had to taste test it, then sliced it into pretty pieces to be enjoyed by all.


I was not the only one to make deliciousness for this night. There was Jessica's Apple Dump Cake, Heather's Sweet Potato Bread, Laurinda's Gooey Chocolate Cake.......


Jennifer's Pumpkin Pie and Nicole's Peanut Butter cookies.
I am sure any of them would share their recipe if you would like it. 
We also enjoyed some apple cider, hot chocolate, coffee (complete with flavored creamers) lemonade and sweet tea. We all left fat and sassy, with a plate full of goodies for our husbands.

I would have liked to take more pictures of my friends and the fun we were having, but I was too busy stuffing my face with goodness and listening to the devotions.
We picked the perfect "seasoned Mom" for our first night in. She was a great blessing and encouragement. She reminded us that in order to raise Godly children  we need to continually read the directions, God's Holy Word. Afterward, we bombarded her with questions about raising our children, which she handled with wisdom and grace.
We also shared our funniest moments with our children and our daily lives as Moms. It was very encouraging to know everyone else shares in the same trials I have, and also hearing some different perspectives on  how to handle situations that arise. All and all, it was a fabulous night in!

Thank you to everyone who shared this night with me, and to everyone who read this post! I love you all!

Please feel free to share this on facebook!

Baking from my heart to your kitchen,