Showing posts with label bar. Show all posts

Wednesday, June 27, 2012

Key Lime Cheesecake Bars


For some reason I am all about some lemon-lime this week. So get ready!


I was asked to make a dessert last weekend and my immediate thought was "Key Lime".


I started hunting or rather Pinteresting (which is now a word everyone understands) Pinterest is right up there with Google for me these days. Instead of "googling" I go "pinning". What will they think of next.


Ok ... rabbit trail has ended, back to the dessert.


I have to be honest, I didn't want to spend all day on this dessert, so that illiminated quite a few I have been wanting to try.


Then I came across this recipe over at Confessions of a Cookbook Queen. Another blog I love to read.

I decided to give it a whirl or uh... swirl in this case.


Just take a look... Yum.


I followed her recipe so head on over to her blog and check it out, her pictures are stunning.
I am just going to include some step by step instructions and made minor tweaks.


You will need:

Crust:
2 cups graham crackers
 1/2 cup( 1 stick) unsalted butter, melted

Preheat oven to 325 degrees.

Line a 10×10pan with parchment that overhangs the edges.
Mix the butter and graham crackers together and press into the bottom of the pan evenly. Bake crust for 5 minutes and allow to cool completely.

Filling:
2 packages (8 oz. each) cream cheese, softened
1/2 cup granulated sugar
2 large eggs plus one large egg white
2 Tbsp all purpose flour
1/2 cup sour cream
1 teaspoon vanilla extract
3/4 cup prepared lime curd, divided (recipe
below)

Liquid green food coloring
Liquid yellow food coloring

Lime Curd
8 tbsp (1 US. stick) unsalted butter,
softened at room temperature
1 cup sugar
2 large eggs
2 large egg yolks
1/3 cup plus 4 tbsp. Key Lime juice
Beat butter and sugar in a large bowl using anelectric mixer. Slowly add the eggs and yolks one at a time, mixing well after each addition. Pour in lime juice and mix again.
Expect the mixture to look curdled, this is normal.

Cook the mixture over medium heat in amedium-size saucepan until it looks smooth (no longer curdled.) Increase the heat slightly and cook, whisking constantly, until the mixture thickens.

Clip a thermometer to the side of the pan and cook until the mixture reaches 170 degrees.
Remove the curd from the heat. Transfer the curd to a bowl and press plastic wrap on the surface of the lime curd to keep a skin from forming. Chill the curd in the refrigerator.
The curd will thicken further as it cools.
Covered tightly, it will keep in the refrigerator for a week and in the freezer for 2 months.

Next up the filling....

Beat cream cheese and sugar in a large bowl with mixer on medium high speed until smooth. Beat in eggs on low speed, 1 at a time.
Beat in sour cream and vanilla, then flour just until blended.
Remove 1 cup of batter and reserve. Pour the rest of the batter over the crust.


Tint the lime curd green.
I used two drops green and three drops yellow to get a key lime rind color

Mix 1/2 cup of tinted lime curd with the 1 cup of reserved batter.


Place spoonfuls or dollops of this mixture in no particular fashion on top of the plain cheesecake batter. Dollop the remaining 1/4 cup of lime curd across the previous mixture. Use skewer to swirl the mixtures together to create a marbleized effect.
Bake for 35 minutes at 325 degrees F.


Let cool completely in pan then refrigerate.
Lift cheesecake out of the pan with parchment overhang.  

Cut into squares and watch them disappear


I tried to save you a piece, but I ate it for breakfast.

They were so good you should run out, but some Key Lime juice (I found mine at the local store) and make these. If you are feeling really adventurous you could squeeze all those little limes yourself. Knock yourself out and come back and let me know what you think.

Thanks again Cookbook Queen and Sprinkle Bakes for this fabulous recipe


Baking from my heart to your kitchen,


Linking up over at

Wednesday, May 23, 2012

Lemon Bars


Remember lemon heads?


First they are sweet and then.. BAM! sour... face puckering... and then done.


That is kinda how these are to me.


First bite you are like.. mmm.. and then ... Sour... and then sweet again.


Seriously, that's the only way to describe these.


The most important thing to know is that they are yummy.


Crust
1 1/2 cups all purpose flour
1/3 cup sugar
1/4 tsp salt
1 tbsp lemon zest
1/2 cup butter, room temperature

Filling
4 large eggs
1 1/3 cups sugar
1 cup lemon juice, freshly squeezed and strained


Preheat oven to 350F. Line 9×9-inch baking pan with aluminum foil.
 First, make the crust.
In a large bowl, whisk together flour, sugar, salt and lemon zest.
Cut butter into chunks and add to flour mixture.  


Blend in with an electric mixer at low speed until mixture forms coarse, sandy crumbs.


Pour into pan and press mixture down
(with your fingers or the back of a spoon) into an even layer.
Bake for 16-19 minutes, until just lightly browned around the edges.


While crust is baking, make filling. Whisk together all filling ingredients in a large bowl.
When the crust comes out of the oven and is still hot, pour in filling mixture.


Bake for about 20 minutes, or until filling is set and does not jiggle when the pan is gently shaken.
Cool completely before slicing.
Top slices with confectioners’ sugar to serve.


Now, something to keep in mind.
Fresh out of the oven, they are warm and delicious, however very tart.

Put them in the fridge overnight and in the morning, they are perfection.

Enjoy!

Baking from my heart to your kitchen,


Friday, March 9, 2012

Hello Dolly and a little history


When I was younger I worked at a bakery counter and they had these delicious treats called "Hello Dollies". I never questioned the name, they were delicious and that is really all that mattered. I had forgotten about them until I came across a recipe while looking for something else entirely. I knew I needed to make them,  now they were back in my head and would not get out. I even made a special trip to the store to get coconut.

Then I started to wonder, why Hello Dolly? Apparently alot of other people out in blog land wondered too, I found a ton of variations and speculation. I wanted answers! I kept digging. I finally found the answer I was looking for on cabingoddess.com. She had a picture of a recipe card written by her grandmother, I knew I was on to something. She had the same information I had read on others blogs but she took it a step further. Here is what she found.
"The recipe became famous during the 60′s when Hello Dolly was on Broadway. During the show, there is a restaurant scene. Clementine Paddleford’s (our countries first food journalist, the original foodie!) food column in “The Week “ magazine on September 19, 1965 featured a “Hello Dolly Cake” which an 11 year old girl borrowed from her grandmother. The recipe included graham crack crumbs, flaked coconut, chocolate chips, chopped nuts, and condensed milk.


Here is the article, love that she had this on her blog, this is what I was looking for:

19 September 1965, Syracuse (NY) Post-Standard, “Clementine Paddleford Recipe Swap,” This Week magazine, pg. 20, col. 2: “Hello Dolly” Cake: ALECIA LEIGH COUCH OF DALLAS, TEXAS, 11, is today’s youngest. She sends a cake recipe borrowed from her grandmother, who cooks young, too. The “Hello Dolly” name was Alecia’s idea. “No need even to mess us a bowl,” Alecia writes, “and that’s the big reason why I call this my favorite cake recipe. And of course it’s good!”


However, I also found that on July 22, 1965, the Ada (OK) Evening News had published a similar recipe for “Hello Dolly Cookies.” So no one knows where the original recipe came from, maybe the back of a sweetened condensed milk can. It also has many different names.... Magic bars, 7-layer bars.... on and on. I've never seen one cookie have so many different names. One thing remains the same, they are delicious and you must try them!


Mystery solved... we may not know the origin of the bar, but at least we figured out how they came by the "Hello Dolly" name.

Here is how I made mine:


You will need:
3 cups Chocolate Graham Crackers
1 1/2 sticks butter, melted
1 cup nuts (I used walnuts)
1 cup chocolate chips
1 can (14oz) of sweetened condensed milk
1 1/2 cups coconut

Preheat oven to 375 degrees


Crush the graham crackers I and melt the butter. Mix together.


Line a 9x13 pan with parchment and press the graham cracker butter mix onto the bottom of the pan. Bake for 20 minutes, rotating once. Let cool.


Once cooled sprinkle on the nuts.


Add the chocolate chips.


Next, pour on the sweetened condensed milk.


Lastly, sprinkle on the coconut.
Bake for 10-15 minutes until coconut is toasted.

Let cool, or if your like me, grab a knife and fork and dig in.


Yum!


Baking from my heart to your kitchen,


Tuesday, January 3, 2012

Over the Top, Chocolate Chip Oreo Brownie Bar


There are only two words to describe this dessert.

Stops.Traffic.

No, not because I used the holiday red Oreos, but because it is so rich and delicious, it stops traffic.
All of my favorite sweets wrapped up in one delicious bite. 

I wanted the first blog post of the new year to be fantastic and this does not disappoint.
I would like to tell you that this was my idea, but my mind does not think outside the box this far.
Maybe one day, but not today.
The original recipe is from here. Very inspiring.

Let's go through these layers step by step. The recipe will be at the end.


Start with the chocolate chip cookie layer. 


The pile on some Oreos. These holiday Oreos are so cute, I hated to cover them up, but I must.


Drizzle with some caramel sauce. Nope. We are not done.


Spread on some fudgey brownies. Yes, this does look good as is, but it needs one more thing.


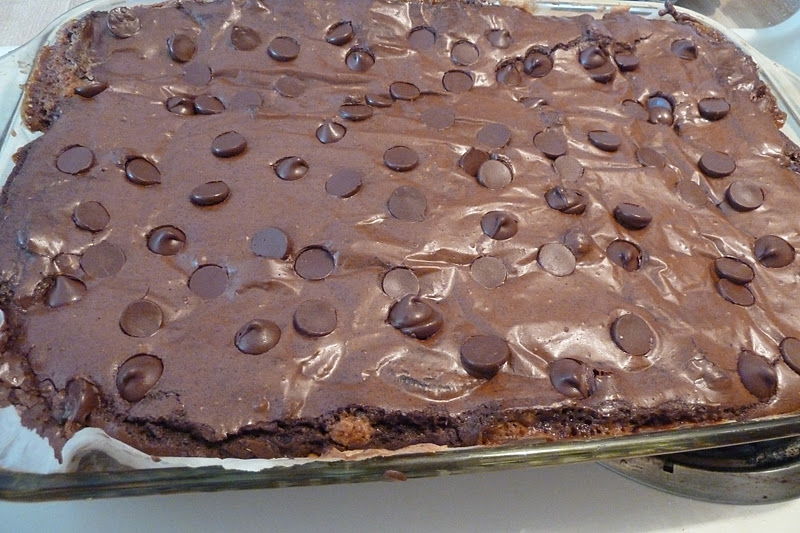
Sprinkle on some double chocolate chips. There! Now we can bake it.


Looks yummy already. Let's look inside.


This does not do justice to how good this actually looks. But I was excited to take a bite.


I thought these would give me a cavity on the first bite, but surprisingly enough, they are rich and delicious.
Just brew up some coffee or pour a large glass of milk and enjoy! 
Caution: these are addicting.

Happy New Year!

For this recipe you will need:

1 cup (2 sticks) butter, softened
1 cup granulated sugar
3/4 cup light brown sugar
2 large eggs
1 Tablespoon pure vanilla extract
2 1/2 cups all-purpose flour
1 teaspoon baking soda
1 teaspoon salt
 2 cups (12 ounces) chocolate chips plus more to sprinkle on top
1 pkg Double Stuffed Oreos
 1 box Brownie mix
 1/4 cup caramel topping

Preheat oven to 350 degrees F.
Cream the butter and both sugars in a large bowl with an electric mixer on medium speed for 3-5 minutes. Add the eggs and vanilla and mix well to thoroughly combine.
In a separate bowl, whisk together the flour, baking soda and salt, then slowly incorporate into the mixer until the flour is just combined.Stir in chocolate chips.
Spread the cookie dough in the bottom of a 9×13 baking dish that has been lined with wax paper and sprayed with cooking spray.
Top with a layer of Oreos.
Drizzle caramel topping over Oreos.
Mix together brownie mix. Pour the brownie batter over the cookie dough and Oreos.
Bake at 350 degrees F for 45-55 minutes.


Baking from my heart to your kitchen,


Monday, November 21, 2011

Caramel Apple Cheesecake Bars and Life


I have had alot going on in my life the last few weeks. The old saying, "When it rains it pours", pretty much sums up my life lately. I wasn't going to post anything on my blog about it all and just stick to talking about food, but oh well, so much for that. My mind has been consumed with everything going on. 

My best friend had a baby about three weeks ago and has been in the hospital ever since. There have been complications and it has been one thing after another. We are praying continuously for her. Thankfully, the baby boy is healthy, beautiful and a constant joy.
Then yesterday, I get the call that my Grandfather has passed away. It was not a surprise, he was in hospice care, yet still a sad day. Every Christmas was spent at his house. He was a quiet, strong man who loved us all dearly in his own special way. Since the day I was born, he never missed a birthday. No matter where I moved to or how old I got, I always knew there would be a card in my mailbox from my Grandpa. With Thanksgiving just three short days away, I want to tell you how thankful I am. Yes, life tries to get the better of you, but you have a choice to drown in self pity or find the blessing. My Grandfather left a journal for his children and grandchildren and I cannot wait to read what he has left us. As I stated, he was quiet and humble, but has accomplished much. I know I will be posting more about him in the future. 
Of course, when things get me a bit down, I bake.
Let's talk about this dessert for a minute.

You will need:

Base:
2 cups all-purpose flour
1/2 cup firmly packed brown sugar
¼ teaspoon salt
½ teaspoon cinnamon
1 cup (2 sticks) butter, softened

Cream Cheese Layer:
3 (8-ounce) packages cream cheese, softened
3/4 cup sugar
3 large eggs
1 1/2 teaspoons vanilla extract

Apples:
3 Granny Smith apples, peeled, cored and finely chopped
2 tablespoons sugar
1/2 teaspoon ground cinnamon
1/4 teaspoon ground nutmeg

Streusel Topping:
1 cup firmly packed light brown sugar
1 cup all-purpose flour
½ teaspoon cinnamon
1/2 cup quick cooking oats
1/2 cup (1 stick) butter, softened

Caramel topping:
You could use my homemade one found here. I made it ahead of time and had it ready.
or caramel ice cream topping

I found this recipe on melskitchencafe.com, you can find her recipe here. The only thing I did differently, was use my own caramel sauce and added extra to the cheesecake layer.

Preheat your oven to 350 degrees.


This has a few steps, but it all comes together nicely and is so worth it. 
Let's start with three Granny Smith apples.


After you have peeled and diced them, sprinkle with the sugar and spices, so  nice. Put aside.


Next, make the struesel topping. Mix all the struesel ingredients together and mix until crumble. I actually used my hands to crumble.


Onto the base. 
In a medium bowl, combine flour and brown sugar. Cut in butter with a pastry blender or two forks until mixture is crumbly but combined. Press evenly into a 9X13-inch baking pan lined with aluminum foil. Bake for 10 minutes or until lightly browned.
I used the two forks method and it worked nicely.


While the crust is baking, in a large bowl, beat cream cheese with 1/2 cup sugar until smooth. Then add eggs, one at a time and then the vanilla. Mix well. 


Now that we have everything ready, it will be a sinch to put together.
Oh, I did make the caramel sauce a day ahead and had it ready. 


Pour the cheesecake layer over the warm crust.


Spoon the apple layer even over the cheesecake layer.


Sprinkle the struesel topping on the apple layer.
Bake for 30 minutes until the filling is set.


While still warm, drizzle on the caramel topping, reserving some for each individual slice. 


Then slice, drizzle and enjoy!

I am thankful to you for following along with my blog and letting me talk about life with you. 
I know many of you have lost loved ones and can sympathize with me. Let's be thankful for the time shared with them. My Grandpa was Italian, he came over to the US when he was a boy. Every Christmas we had an Italian feast, I loved it! I will be posting a recipe in honor of him soon.

Does your family have a favorite food tradition? I would love to hear it.


Baking from my heart to your kitchen,